
How to Display Collectibles of Different Sizes Together
Learn how to combine small, medium, and large collectibles in one balanced display using visual anchors, risers, safe supports, thoughtful spacing, and controlled lighting.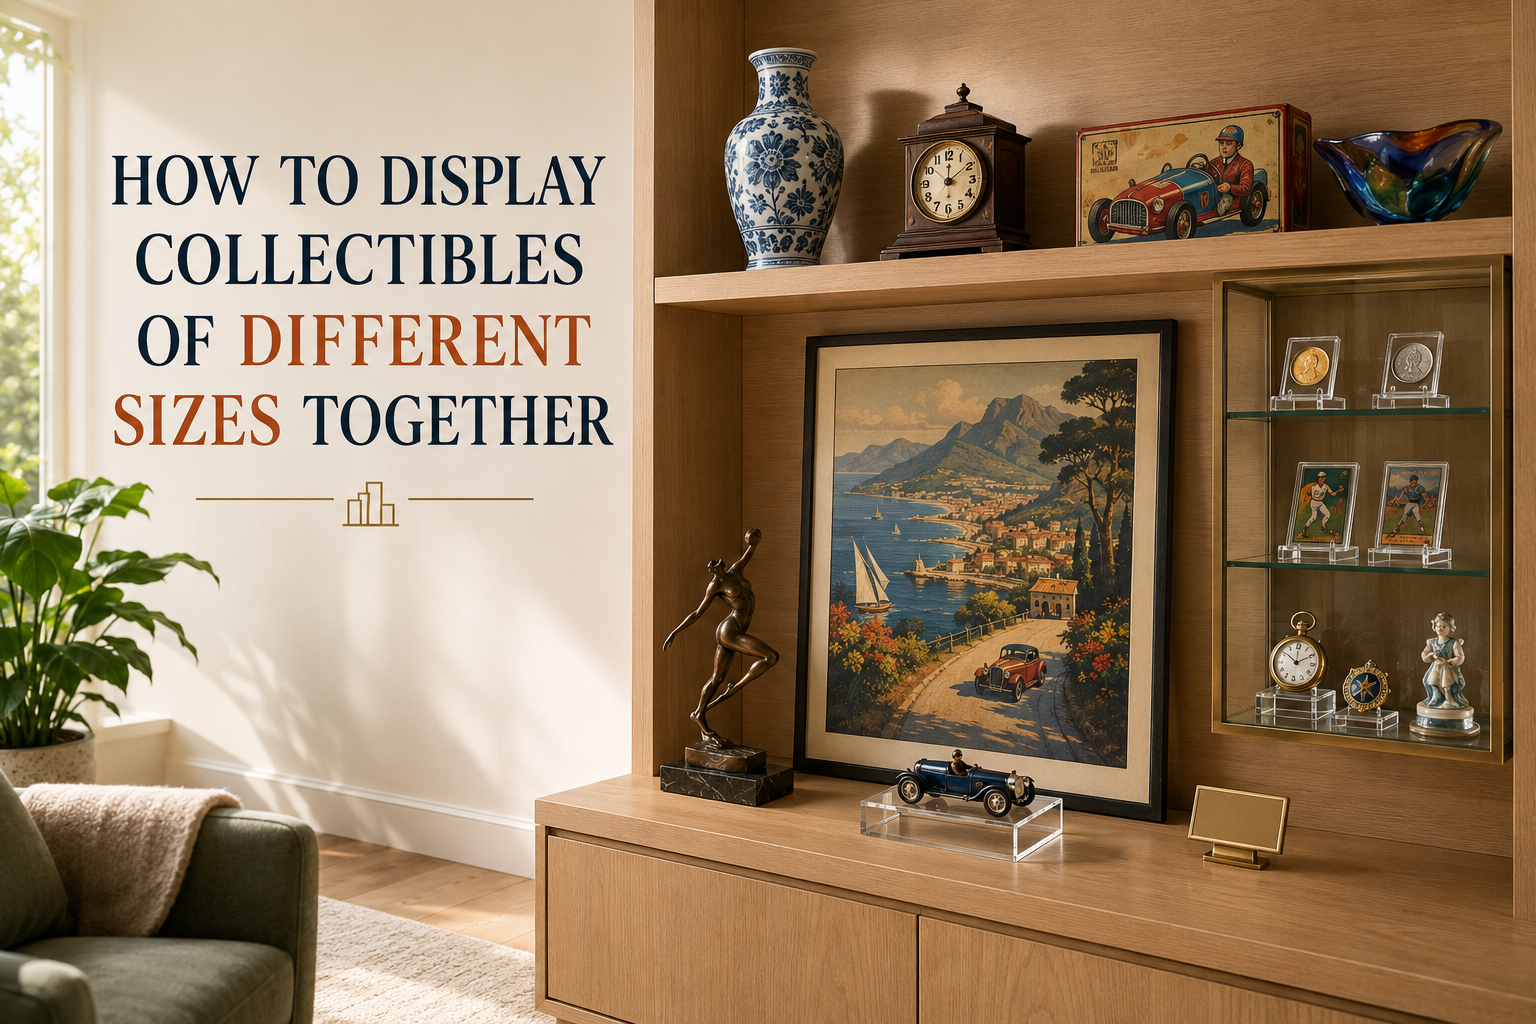
Ready to Browse Current Listings?
Search live eBay listings related to this guide through Deal Hunter.
A collection does not need matching dimensions to look organized. In fact, combining large statement pieces with medium-sized objects and small details can produce a display that feels more interesting and personal than a perfectly uniform arrangement. The challenge is preventing the largest objects from overwhelming everything else or allowing smaller collectibles to disappear among them.
The most successful displays use size differences intentionally. Every object receives a visual role, and the collection is arranged so that the viewer’s eye moves naturally from one piece to another.
Begin with a Visual Anchor
Choose one large or visually prominent collectible to serve as the anchor. This might be a framed poster, advertising sign, large ceramic vessel, antique clock, model vehicle, sculpture, or boxed toy.
The anchor does not always need to be the most valuable object. Its purpose is to establish the display’s structure. It gives the eye a starting point and helps determine where the remaining pieces should be placed.
An anchor can be positioned:
- In the center for a formal, symmetrical display
- Slightly off-center for a more relaxed arrangement
- At one end to create movement across a shelf
- At the back so smaller objects can be layered in front
Avoid automatically placing the largest object directly in the middle. An off-center anchor often creates a more natural and visually interesting composition.
Create Three Levels of Visual Hierarchy
Dividing the collection into three general size groups makes arranging it easier:
- Large objects establish the display
- Medium objects connect the large and small pieces
- Small objects provide detail and encourage closer viewing
Medium-sized collectibles are particularly important. They prevent the display from jumping abruptly from one very large object to several tiny ones.
For example, a large framed movie poster could be paired with a medium boxed toy, a tabletop figurine, several trading cards, and a small promotional pin. The boxed toy bridges the visual gap between the poster and the smallest memorabilia.
The objects do not need to be related by manufacturer or category, but they should share at least one connection, such as subject, historical period, color, material, or personal significance.
Use Risers to Give Smaller Objects Importance
Small collectibles frequently disappear when placed directly beside larger pieces. Risers, plinths, acrylic blocks, plate stands, and stepped platforms can raise them into a more visible position.
Different elevations also prevent a collection from resembling a line of objects waiting on a shelf. Use at least two or three heights to create depth, but avoid making every object a different height. Too many levels can make the display feel restless.
Suitable supports include:
- Clear acrylic risers
- Stable wooden blocks
- Fabric-covered display platforms
- Plate and book stands
- Coin and medal easels
- Shadow boxes
- Custom object mounts
Professional museum guidance emphasizes that mounts should physically support objects and reduce stress on weak areas. The materials touching a collectible should also be stable and appropriate for its surface. Improvised supports that wobble, shed fibers, contain unknown adhesives, or place pressure on fragile areas should be avoided. The Canadian Conservation Institute’s mount-making guidance explains why purpose-built supports are important for museum objects.
Build a Visual Triangle
A simple way to arrange objects of different sizes is to create an imaginary triangle.
Place the tallest or largest object near the top of the triangle. Position medium pieces on either side and arrange smaller objects near the base. The result does not need to be perfectly symmetrical. The triangle is simply a guide for creating a display that feels stable.
A variation is the stepped arrangement:
- Begin with the tallest object at one end.
- Add one or two medium objects nearby.
- Continue toward the smallest pieces.
- Break the progression with one slightly taller item to keep it from looking mechanical.
For long shelves, create several smaller visual groups instead of one continuous line. Leaving space between groups makes each arrangement easier to understand.
Balance Visual Weight, Not Just Physical Size
Two objects of the same dimensions may have very different visual weight. A dark metal clock may appear heavier than a pale ceramic vase. A brightly colored toy package may attract more attention than a larger object in neutral colors.
Consider the following characteristics:
- Color
- Contrast
- Pattern
- Reflectivity
- Shape
- Surface texture
- Amount of printed information
If one side of a shelf contains a large, dark object, the other side may need two or three lighter objects to balance it visually. Balance does not require identical objects or perfect symmetry. It means that neither side appears empty or overloaded.
Brightly colored packaging and bold advertising graphics should be distributed carefully. When every vivid object is placed in one area, the remainder of the display can appear unimportant.
Layer Objects without Hiding Them
Layering creates depth, especially inside cabinets and on deep shelves. Larger objects generally belong toward the back, while small pieces can sit in front on lower supports.
Every object should retain a recognizable outline. If one collectible hides a maker’s mark, important decoration, signature, or distinctive feature on another, adjust the spacing or elevation.
Allow objects to overlap visually without touching physically. Direct contact can cause scratching, abrasion, dye transfer, or pressure damage. This is especially important when combining metal, painted wood, paper, textiles, ceramics, and early plastics.
Do not lean fragile objects against one another for support. Each collectible should remain stable if the surrounding pieces are removed.
Use Negative Space Deliberately
Collectors naturally want to display as much as possible, but filling every available inch can make individual objects difficult to appreciate.
Negative space is the empty area surrounding a collectible. It separates visual groups, emphasizes important pieces, and makes the entire display easier to understand.
Leave additional space around:
- The main visual anchor
- Objects with complicated outlines
- Particularly rare or meaningful pieces
- Items with important labels or signatures
- Delicate objects that should not be crowded
If the collection exceeds the available display space, rotate the objects rather than forcing everything into one arrangement. A smaller, carefully selected display often makes the larger collection feel more significant.
Connect the Objects through a Clear Theme
Different sizes appear more intentional when the objects share a visible relationship. The connection could be based on:
- Manufacturer
- Historical era
- Color palette
- Material
- Country of origin
- Character or subject
- Product category
- Event or cultural movement
A transportation display, for instance, might combine a large advertising sign, a medium model car, a framed postcard, a hood ornament, and several small dealership tokens. Their dimensions differ, but the shared theme makes the arrangement feel unified.
Avoid adding an unrelated object simply because it fills an empty space. Empty space is preferable to a piece that confuses the display’s purpose.
Protect Collectibles while They Are Displayed
An attractive display should never compromise preservation. Use stable shelves, secure wall anchors, properly sized stands, and protective cases where necessary.
Round or top-heavy objects may need discreet ring supports or custom cradles. The National Park Service notes that cradle and ring supports can stabilize vulnerable or rounded objects while reducing stress on weak points. NPS museum storage guidance provides examples of these support methods.
Keep valuable or fragile pieces away from shelf edges, doors, vibration, pets, children, air vents, and busy walkways. Glass doors or enclosed cases can reduce dust and accidental handling.
Light-sensitive materials require particular care. Paper, photographs, textiles, inks, and many plastics can fade or deteriorate under prolonged illumination. Display lights should be used only when needed, and direct sunlight should be avoided. The Canadian Conservation Institute recommends limiting light exposure for sensitive books and colored media because the resulting changes can be permanent.
Keep Labels Small and Consistent
Labels can provide an object’s name, maker, date, origin, or personal story. They are especially helpful when a display contains collectibles of several sizes or categories.
Use the same label style throughout the display. Consistent typography, color, and dimensions prevent labels from competing with the objects.
A basic label might include:
- Object name
- Manufacturer or artist
- Approximate date
- Country or region
- One important historical detail
Position labels close enough to their objects that the connection is obvious, but do not attach adhesive labels directly to a collectible.
Test the Display before Finalizing It
Arrange the collection temporarily before installing permanent shelves, mounts, or wall hardware. Photograph the arrangement from the room’s normal viewing position.
A photograph can reveal problems that are less obvious in person, including:
- One side appearing too heavy
- Small pieces becoming lost
- Distracting gaps
- Excessive repetition
- Objects blocking one another
- Reflections from lighting or glass
- An anchor placed too high or low
Make one change at a time and take another photograph. This provides a record of each version and prevents the display from becoming overworked.
A Practical Arrangement Example
Imagine a collection containing one large advertising sign, two medium ceramic pieces, one boxed toy, five small figures, several coins, and three postcards.
The advertising sign could serve as the background anchor. The ceramic pieces could be positioned at different heights to either side. The boxed toy could balance the heavier ceramic object, while the figures could be arranged in two small groups on acrylic risers. Coins could be placed in a shallow presentation stand near the front, and the postcards could be mounted vertically to connect the tabletop objects with the sign behind them.
The objects vary greatly in size, but the combination of height, spacing, grouping, and visual balance allows every piece to contribute to the display.
A strong mixed-size display should feel organized without looking rigid. Let the largest objects establish the structure, use medium pieces to create transitions, and elevate the smallest items so they can be appreciated. Thoughtful spacing and safe support will allow the collection to tell a unified story while protecting every object within it.